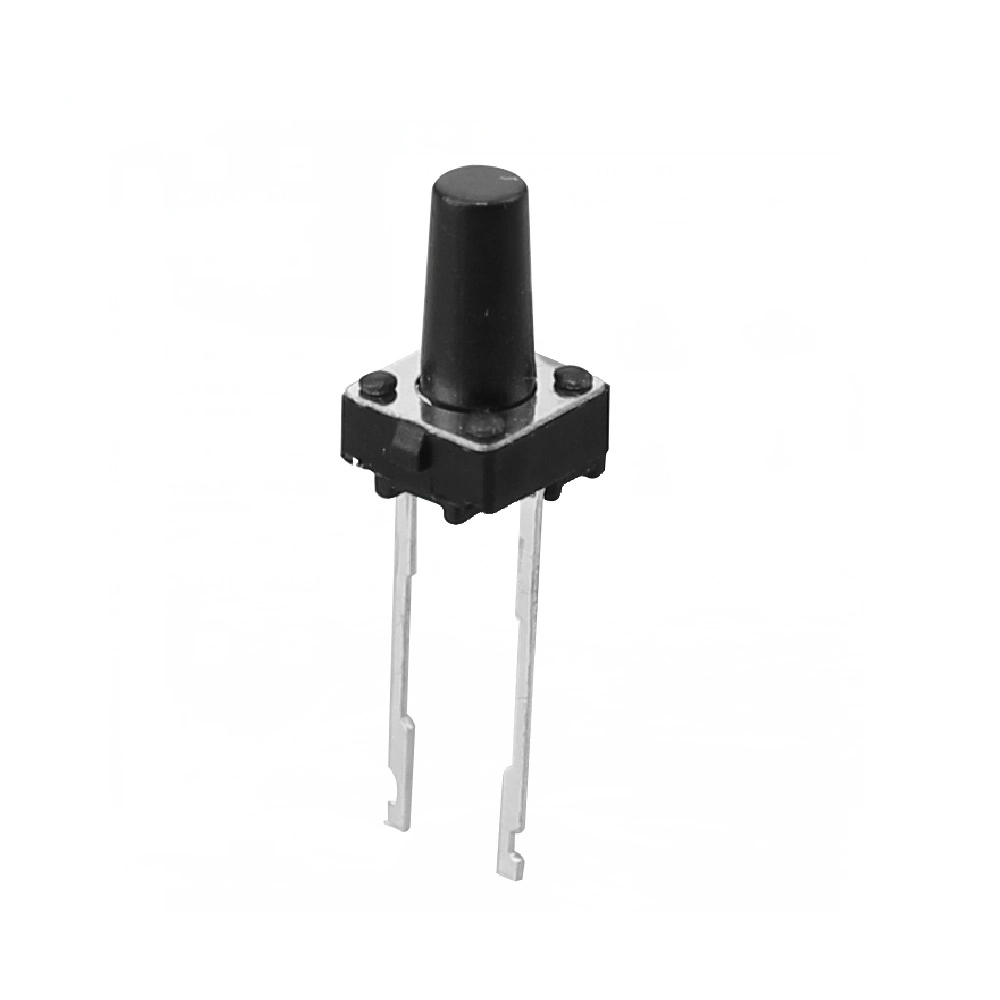

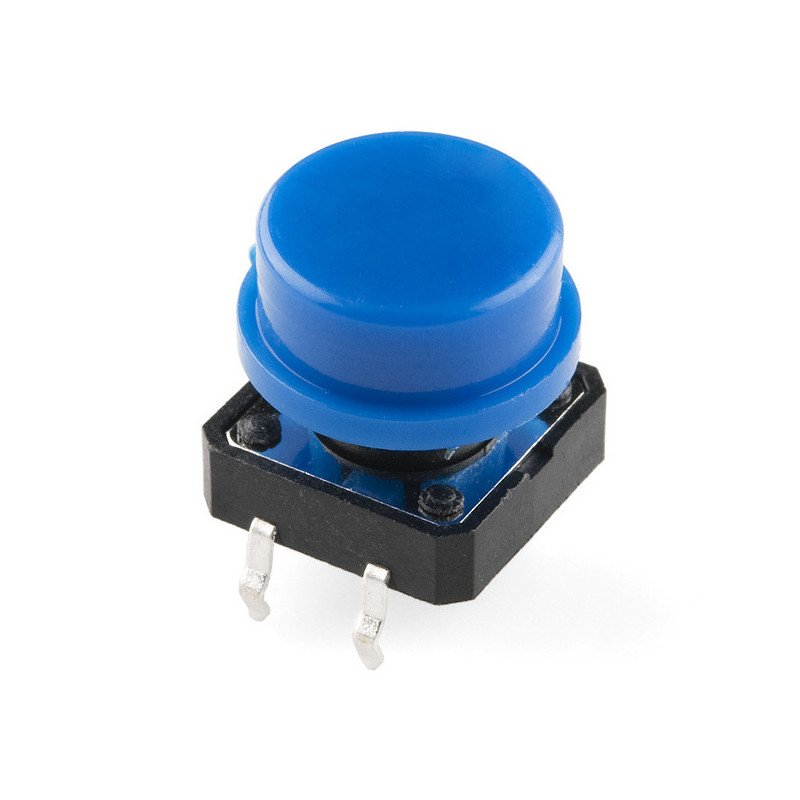
Product Overview
The Mini Push Button 2-Pin Long is a compact, tactile switch designed for low-voltage electronic circuits, prototyping, and control panels. Featuring a long actuator for easy operation and durable brass contacts, this momentary push button ensures reliable on/off functionality in consumer electronics, DIY projects, and industrial devices. Its simple 2-pin design and through-hole mounting make it ideal for breadboards, PCBs, and quick repairs.
Key Features
- Compact Size: 12mm actuator length for precise, ergonomic pressing.
- Durable Contacts: Brass terminals with 100,000-cycle lifespan.
- Momentary Action: SPST (Single Pole Single Throw) normally open (NO) operation.
- Wide Compatibility: 3–24V DC/AC voltage rating for versatile use.
- Easy Mounting: Through-hole pins with 5mm lead spacing for PCB or breadboard integration.
- Material: Flame-retardant ABS housing with metal actuator.
- Compliance: RoHS and REACH certified.
Technical Specifications
- Rated Voltage: 24V DC/AC (max)
- Rated Current: 50mA (DC), 30mA (AC)
- Contact Resistance: ≤50mΩ
- Operating Force: 160–220gf
- Travel Distance: 0.5mm ±0.2mm
- Operating Temperature: -25°C to +70°C
- Pin Length: 8mm (below PCB)
- Dimensions: 12mm (H) x 6mm (W) x 6mm (D)
Benefits
- Space-Saving: Fits densely packed PCBs and small enclosures.
- User-Friendly: Tactile feedback for confident operation.
- Cost-Effective: Affordable solution for prototyping and mass production.
- Longevity: Corrosion-resistant contacts ensure consistent performance.
- Versatile: Works with Arduino, Raspberry Pi, and industrial controllers.
Usage Instructions
- Mounting: Insert pins into PCB/breadboard holes; solder for permanent connections.
- Wiring: Connect one pin to the input signal and the other to ground/power.
- Testing: Press the button to close the circuit; verify continuity with a multimeter.
- Integration: Pair with LEDs, relays, or microcontrollers for interactive projects.
Safety & Storage
- Handling: Avoid excessive force on the actuator to prevent damage.
- Storage: Keep in anti-static packaging away from humidity and dust.
- Operational Limits: Do not exceed 24V or 50mA to avoid contact arcing.
- Soldering: Use ≤350°C soldering iron; limit heat exposure to 3 seconds.
Applications
- Electronics prototyping (Arduino, Raspberry Pi)
- Control panels for appliances and machinery
- Reset/start buttons in DIY gadgets
- Interactive displays and IoT devices
- Educational STEM kits and robotics
- Automotive and aerospace dashboards
Why Choose the Mini Push Button 2-Pin Long?
This tactile switch combines durability, simplicity, and affordability, making it a staple for engineers and hobbyists. Its long actuator enhances usability in tight spaces, while the robust brass contacts guarantee reliability in high-cycle applications. Whether building a prototype or upgrading industrial equipment, this button delivers consistent performance across diverse environments.
Wiring Diagram
Here’s a basic wiring setup for connecting a mini push button to an Arduino:
+--- Push Button ---+
| |
| |
+5V GND
| |
| [R]
| |
| GND
|
[Pin 2]
Analog/Digital PinDetailed Connections:
- One terminal of the push button connects to 5V power supply from the Arduino.
- The other terminal of the push button connects to an analog or digital pin on the Arduino (e.g., Pin 2).
- Connect a pull-down resistor (10 kΩ) from this pin to ground (GND). This ensures that when the button is not pressed, the pin reads LOW.
Arduino Code Example
Below is an Arduino sketch that reads the button state and turns on an LED when the button is pressed.
#define BUTTON_PIN 2 // Define pin for the button
#define LED_PIN 13 // Define pin for the LED
void setup() {
pinMode(BUTTON_PIN, INPUT); // Set button pin as INPUT
pinMode(LED_PIN, OUTPUT); // Set LED pin as OUTPUT
Serial.begin(9600); // Start serial communication
}
void loop() {
int buttonState = digitalRead(BUTTON_PIN); // Read the button state
if (buttonState == HIGH) { // Button is pressed
digitalWrite(LED_PIN, HIGH); // Turn LED ON
} else { // Button is not pressed
digitalWrite(LED_PIN, LOW); // Turn LED OFF
}
// Debug output to Serial Monitor
Serial.print("Button State: ");
Serial.println(buttonState);
delay(100); // Small delay for stability
}Explanation of Code
- digitalRead() Function: Reads the state of the pin connected to the button. It returns HIGH when the button is pressed and LOW otherwise.
- digitalWrite() Function: Controls the LED, turning it ON when the button is pressed and OFF otherwise.
- Serial Communication: Sends the button’s state to the Serial Monitor to provide real-time feedback.
Applications
Mini push buttons can be utilized in various scenarios, including:
- User Interfaces:
- Used in devices like control panels, toys, and appliances to trigger functions or toggle settings.
- Reset Functions:
- Often found in electronic devices as a reset button to restart circuits.
- Robotics Projects:
- Used for controlling robot movements, actions, or modes.
- Prototyping:
- Common in DIY electronics and prototyping to create user-driven functionality in experimental projects.
- Home Automation:
- Integrated into lighting systems or security systems to provide manual control.
Considerations for Use
- Mechanical Limitations: Ensure the push button can withstand frequent use; consider debounce timing in software.
- Current Rating: Ensure that the button’s rating is appropriate for the circuit it is being used in; avoid exceeding the maximum rated current.
- Debounce Logic: Mechanical switches can generate noise and may need debounce logic. Software debouncing can be implemented with timing or state change detection.
Troubleshooting
If you encounter issues:
- Check Connections: Ensure all wiring connections are secure and correct.
- Verify Resistor Placement: Ensure the pull-down resistor is appropriately connected to ground and to the pin configured in the code.
- Pin Mode: Double-check that the pin is set to INPUT in the Arduino code.
- Button State: Use the Serial Monitor to verify that the button’s state changes as expected when pressed.
Conclusion
The mini push button (2-pin) is a versatile and widely used component in electronics. Its simple operation combined with the ability to interface with microcontrollers like an Arduino makes it ideal for a variety of applications. With proper wiring, programming, and understanding of its operations, the push button can enhance interactivity in electronics and serve a multitude of purposes in automation and control systems.
Only logged in customers who have purchased this product may leave a review.
Related products


Reviews
There are no reviews yet.