
مواتير وتحكم في الحركة
اسألنا - نرد عليك على واتساب
موديول درايفر ستيبر ULN2003 - أزرق
☆☆☆☆☆
0.0
(مفيش تقييمات)
رمز المنتج: 40422
40
ج.م
متوفر
الكمية:
يوصلك خلال 72 ساعة
دفع آمن. نقبل:
بطاقة بنكية
محفظة إلكترونية
الدفع عند الاستلام
إنستا باي
يُشترى معاً عادةً
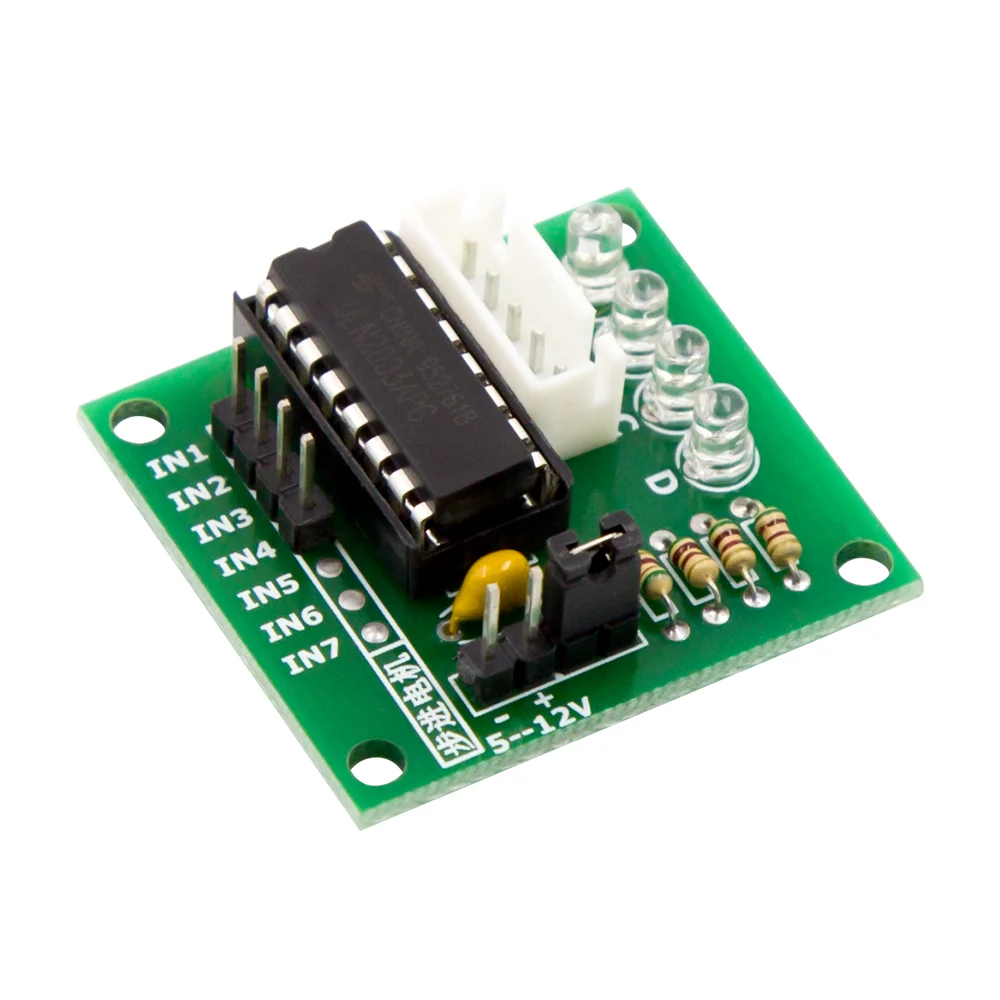 هذا المنتج
موديول درايفر ستيبر ULN2003 - أزرق
40
ج.م
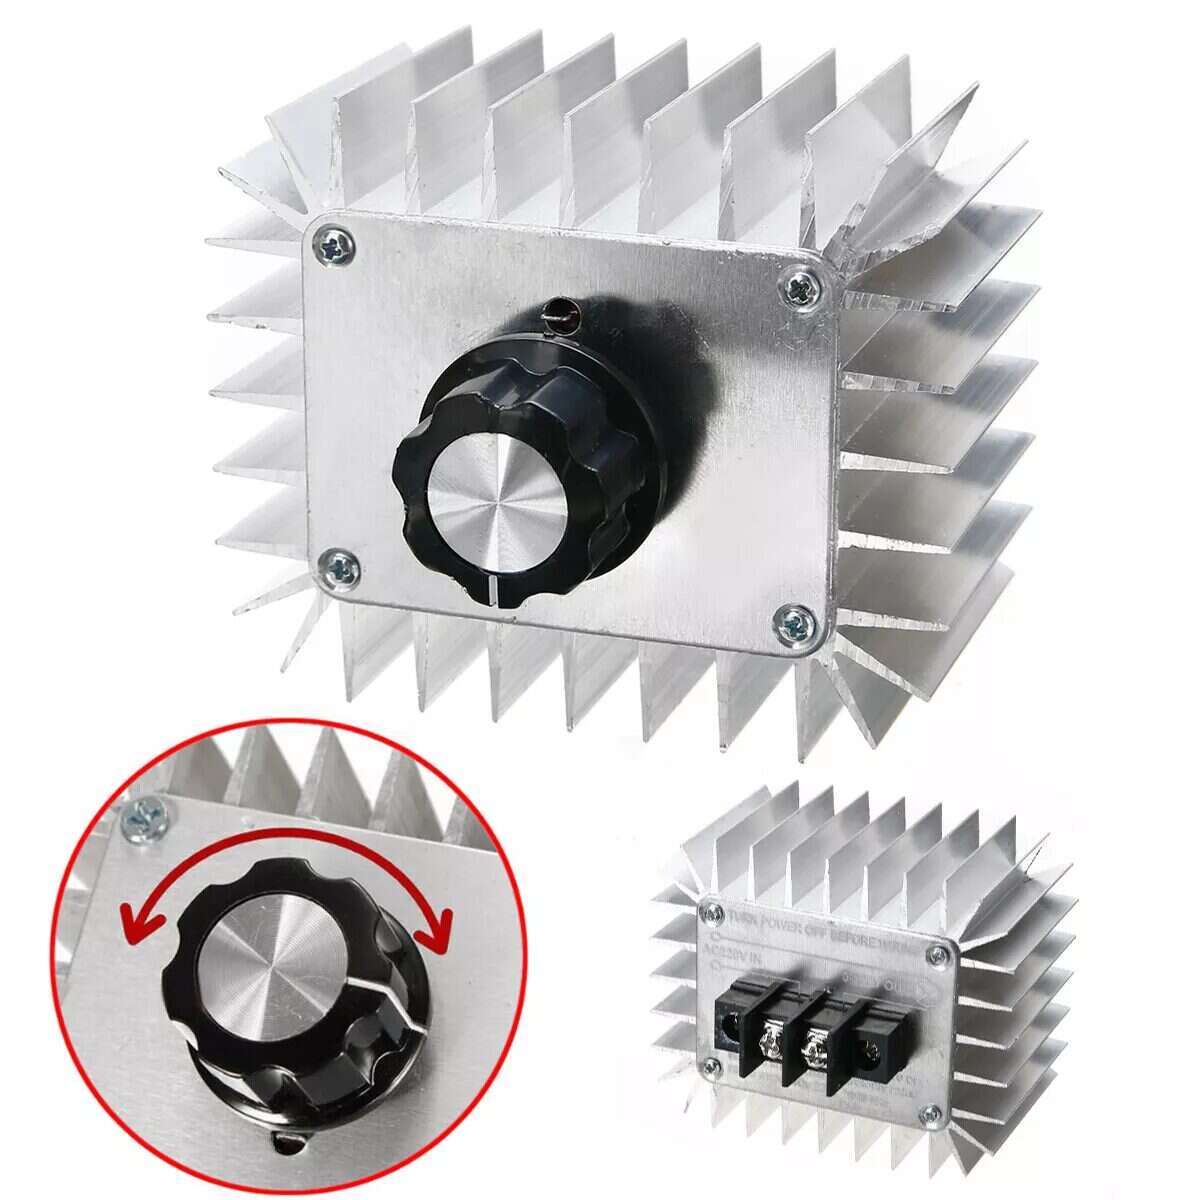
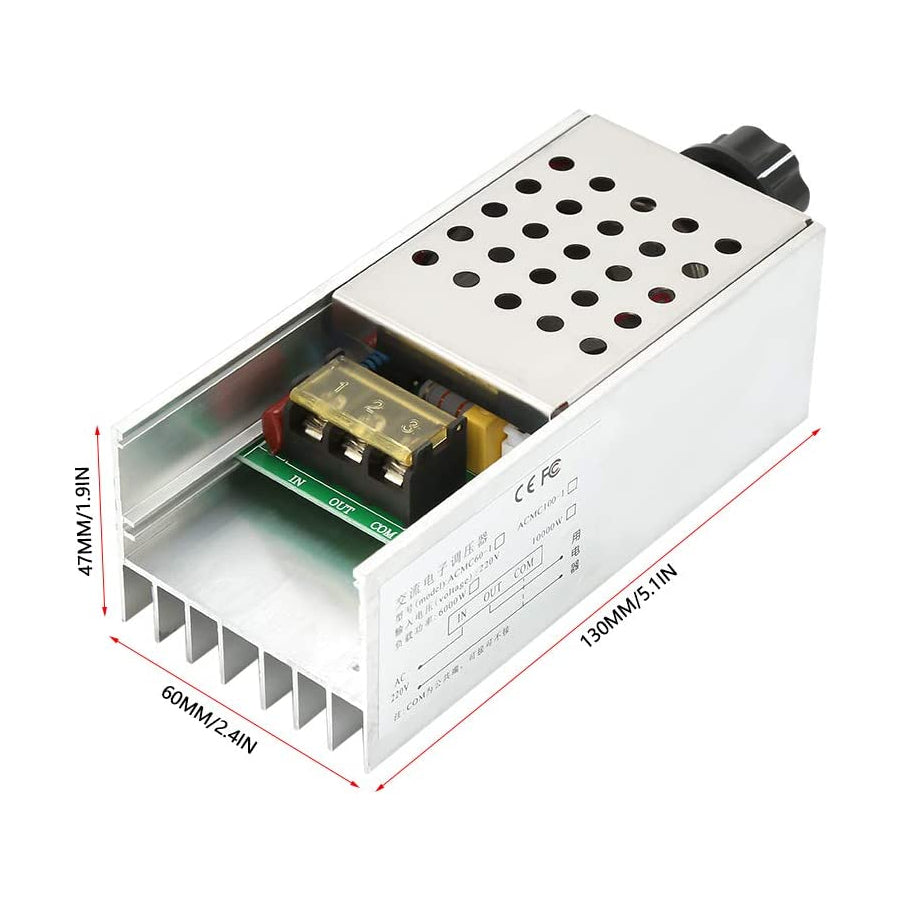
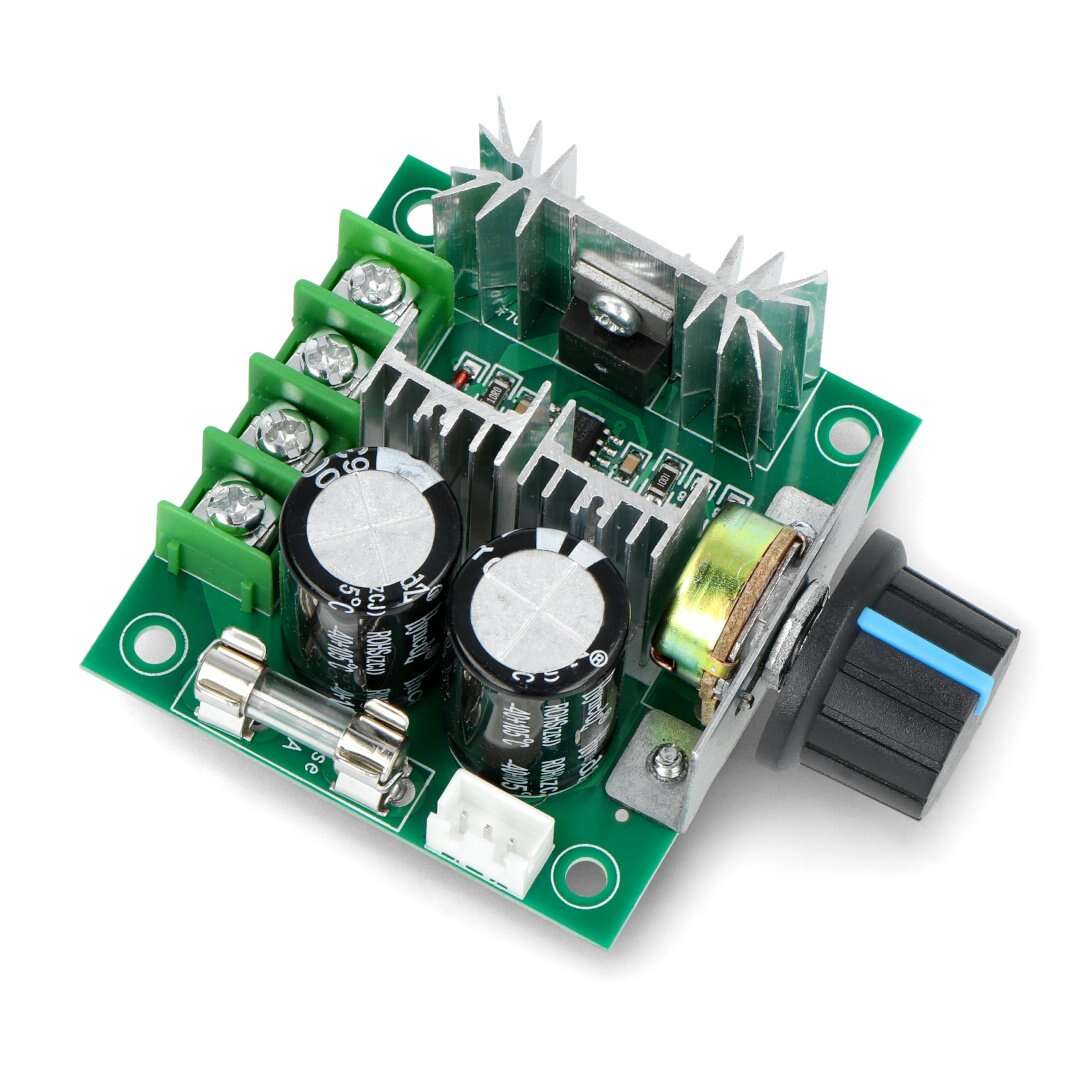
الإجمالي
870
ج.م
عن هذا المنتج
Control 28BYJ-48 Stepper Motor with ULN2003 Driver & Arduino
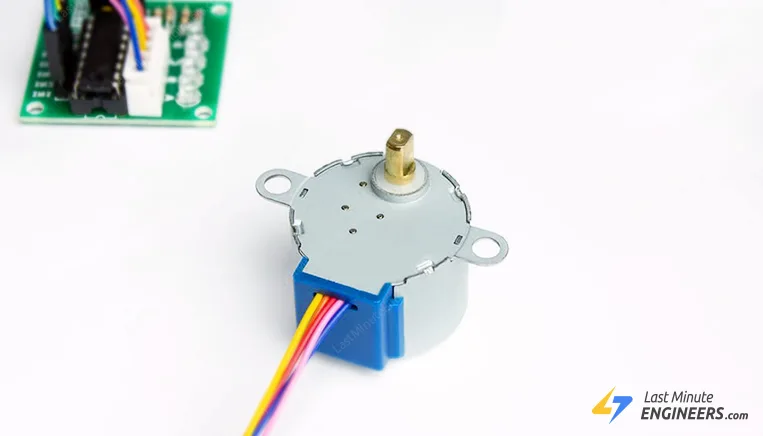
Stepper motors are widely used to control the myriad of common devices we see on a daily basis. From window blinds, 3D printers and DVD players to security cameras and CNC machines, stepper motors are closer to us than you think.
The first step in experimenting with stepper motors is to use 28BYJ-48 stepper motors. They usually come with a ULN2003 based driver board which makes them very easy to use.
Do you know how these stepper motors work?
These stepper motors use a cogged wheel (having 32 teeth) and four electromagnets that form a ring around the wheel.
Each high pulse sent energizes the coil, attracting the teeth closest to the cogged wheel and rotating the motor in precise and fixed angle increments known as steps.
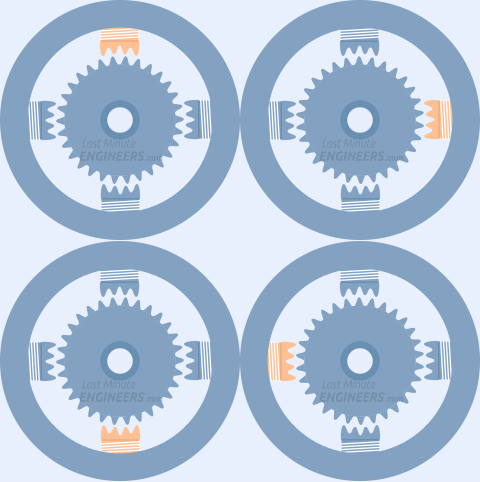
The way you pulse these coils greatly affects the behavior of the motor.
- The sequence of pulses determines the spinning direction of the motor.
- The frequency of the pulses determines the speed of the motor.
- The number of pulses determines how far the motor will turn.
The 28BYJ-48 Stepper Motor
The 28BYJ-48 is a 5-wire unipolar stepper motor that runs on 5V.
The best part about this motor is that it can be precisely positioned one ‘step’ at a time. It does well in projects that require precise positioning, such as opening and closing a vent.
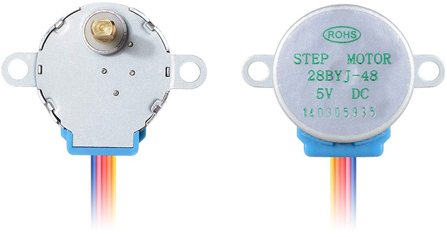
Another advantage is that it is relatively precise in its movement and is quite reliable as the motor does not use contact brushes.
Considering its size, the motor delivers a decent torque of 34.3mN.m at a speed of around 15 RPM. It gives good torque even in stand-still condition which is maintained as long as power is supplied to the motor.
The only downside is that it is a bit power hungry and it consumes power even when it is not moving.
Pinout
28BYJ-48 is a 5-wire stepper motor. The pinout is as follows:
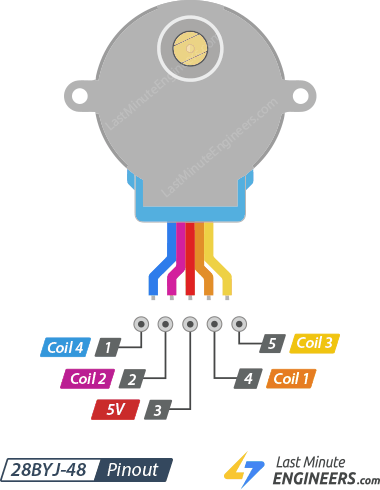
The 28BYJ-48 consists of two coils and each coil has a center tap. The two center taps are internally connected and brought out as the 5th wire (red wire).
One end of the coil and a center tap together form a Phase. Hence 28BYJ-48 has total 4 phases.
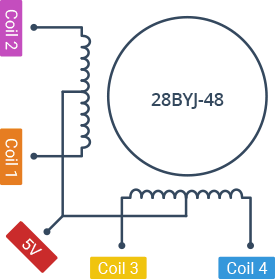
The red wire is always pulled HIGH. When another lead is pulled LOW, the phase is energized.
The stepper motor rotates only when the phases are energized in a logical sequence known as a step sequence.
Gear Reduction Ratio
According to the data sheet, when the 28BYJ-48 motor is operated in full step mode each step corresponds to a rotation of 11.25°. This means there are 32 steps per revolution (360°/11.25° = 32).
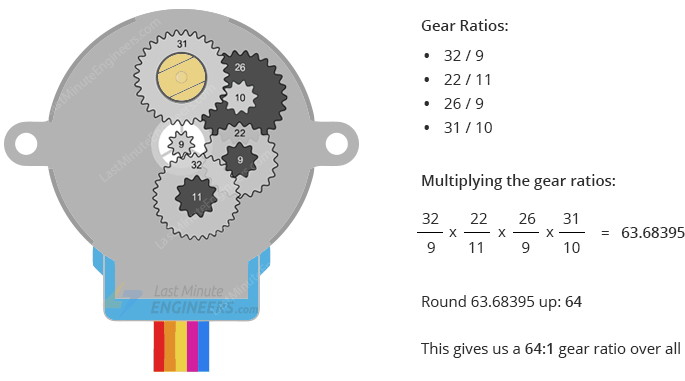
Apart from this, the motor has 1/64 reduction gear set. (actually it is 1/63.68395 but for most purposes 1/64 is a good enough approximation)
This means there are actually 2038 steps (32*63.68395 steps per revolution = 2037.8864 approximately 2038 steps).
Power Consumption
The 28BYJ-48 typically consumes around 240mA.
Since the motor draws a lot of power, it is best to power it directly from an external 5V power supply rather than drawing that power from the Arduino.
Note that the motor consumes power even in stand still state to maintain its position.
Technical Specifications
Here are complete specifications:
| Operating Voltage | 5VDC |
| Operating Current | 240mA (typical) |
| Number of phases | 4 |
| Gear Reduction Ratio | 64:1 |
| Step Angle | 5.625°/64 |
| Frequency | 100Hz |
| In-traction Torque | >34.3mN.m(120Hz) |
| Self-positioning Torque | >34.3mN.m |
| Friction torque | 600-1200 gf.cm |
| Pull in torque | 300 gf.cm |
For more details, please refer below datasheet.
The ULN2003 Driver Board
Because the 28BYJ-48 stepper motor consumes high current, a microcontroller like Arduino cannot control the motor directly. It requires a driver IC like ULN2003 to control the motor so this motor usually comes with a ULN2003 based driver board.
Known for its high current and high voltage capability, the ULN2003 delivers a higher current gain than a single transistor and enables the low voltage low current output of a microcontroller to drive a high current stepper motor.
The ULN2003 consists of an array of seven Darlington transistor pairs, each pair capable of driving a load of up to 500mA and 50V. Four of the seven pairs are used on this board.
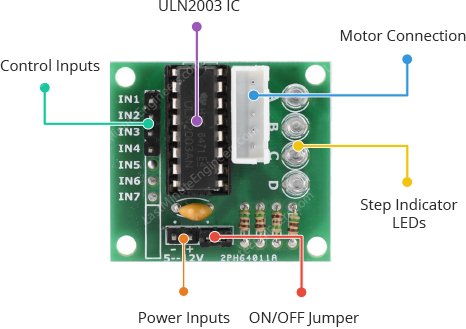
The board has a molex connector that perfectly connects the motor wires making it very easy to connect the motor to the board. There are four control inputs as well as a power supply connection.
The board has four LEDs that show activity on the four control input lines (to indicate stepping state). They provide a good view while stepping.
The board also comes with an ON/OFF jumper to isolate power to the stepper motor.
ULN2003 Stepper Driver Board Pinout
The pinout of the ULN2003 stepper driver board is as follows:
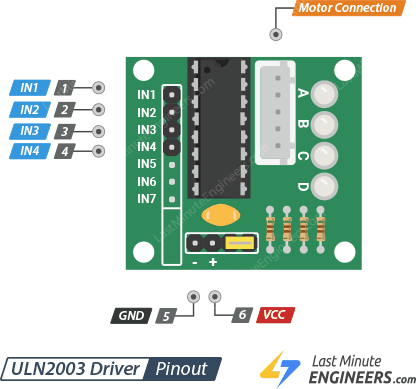
IN1 – IN4 pins are used to drive the motor. Connect them to the digital output pins on the Arduino.
GND is a common ground pin.
VDD pin supplies power to the motor. Connect it to an external 5V power supply. Because the motor draws a lot of power, you should NEVER use the 5V power from your Arduino to drive this stepper motor.
Motor Connector This is where the motor plugs in. The connector is keyed, so it only goes one way.
Wiring 28BYJ-48 Stepper Motor and ULN2003 Driver to an Arduino
Now that we know everything about the motor, we can start connecting it to our Arduino!
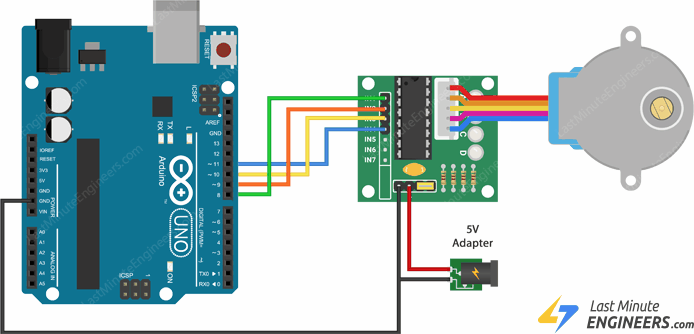
Start by connecting the power supply to the ULN2003 driver. Use a separate 5V power supply to power your stepper motor.
Warning:
Note that it is possible to power the stepper motor directly from the Arduino. However this is not recommended as the motor can generate electrical noise on its power supply lines and it may damage the Arduino.
After that connect the ground from that power supply to the ground of the arduino. This is very important so that we can establish the same voltage reference between the two.
Now connect IN1, IN2, IN3, IN4 of the driver board to Arduino digital pins 8, 9, 10 and 11 respectively.
Finally hook up the motor cable from the stepper motor to the driver board.
When you are done you should have something that looks similar to the illustration shown below.
Arduino Code – Using Built-in Stepper Library
For our first experiment we will be using the Arduino Stepper Library that is packaged with your Arduino IDE.
The stepper library takes care of the stepping sequence and makes it easy to control a wide variety of stepper motors, both unipolar and bipolar.
Here is the simple sketch that makes the stepper motor spin slowly clockwise and then rapidly counterclockwise.
//Includes the Arduino Stepper Library
#include
// Defines the number of steps per rotation
constint stepsPerRevolution = 2038;
// Creates an instance of stepper class
// Pins entered in sequence IN1-IN3-IN2-IN4 for proper step sequence
Stepper myStepper = Stepper(stepsPerRevolution, 8, 10, 9, 11);
voidsetup() {
// Nothing to do (Stepper Library sets pins as outputs)
}
voidloop() {
// Rotate CW slowly at 5 RPM
myStepper.setSpeed(5);
myStepper.step(stepsPerRevolution);
delay(1000);
// Rotate CCW quickly at 10 RPM
myStepper.setSpeed(10);
myStepper.step(-stepsPerRevolution);
delay(1000);
}
Code Explanation:
Sketch begins with including the built-in Stepper library.
#include
Next, we define a constant stepsPerRevolution that holds the number of ‘steps’ the motor will take to complete one revolution. In our case, it is 2038.
constint stepsPerRevolution = 2038;
The 28BYJ-48 unipolar stepper motor has a step sequence of IN1-IN3-IN2-IN4. We will use this information to drive the motor by creating an instance of a stepper library called myStepper with a pin sequence of 8, 10, 9, 11.
Make sure you get it right or else the motor will not work properly.
Stepper myStepper = Stepper(stepsPerRevolution, 8, 10, 9, 11);
There is nothing to set in the setup function because the stepper library internally sets the four I/O pins as outputs.
voidsetup() {
}
In the loop function, we use the setSpeed() function to set the speed we want the stepper motor to move and later use the step() function to tell it how many steps to rotate. Passing a negative number to the step() function reverses the motor’s spinning direction.
The first code snippet makes the motor spin clockwise very slowly. And the other makes the motor spin counter-clockwise at a very high speed.
voidloop() {
// Rotate CW slowly at 5 RPM
myStepper.setSpeed(5);
myStepper.step(stepsPerRevolution);
delay(1000);
// Rotate CCW quickly at 10 RPM
myStepper.setSpeed(10);
myStepper.step(-stepsPerRevolution);
delay(1000);
}
Please note that step() is a blocking function. This means it will wait until the motor has finished moving, to pass control to the next line in your sketch. For example, if you set the speed to, say, 1 RPM and called step(100) on a 100-step motor, this function will take a full minute to finish.
Arduino Code – Using AccelStepper library
The Arduino Stepper Library is perfectly fine for simple, single motor applications. But when you want to control multiple steppers, you’ll need a better library.
So, for our next experiment we will be using an advanced stepper motor library called AccelStepper library. It is much better than the standard Arduino Stepper library in several ways:
- It supports acceleration and deceleration.
- It supports half-step driving.
- It supports multiple steppers at once, with independent concurrent stepping on each stepper.
This library is not included in the Arduino IDE, so you will need to install it first.
Library Installation
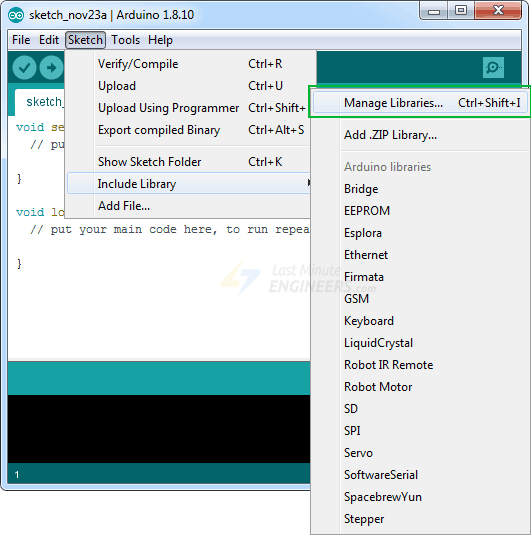
To install the library navigate to Sketch > Include Libraries > Manage Libraries… Wait for Library Manager to download the library index and update the list of installed libraries.
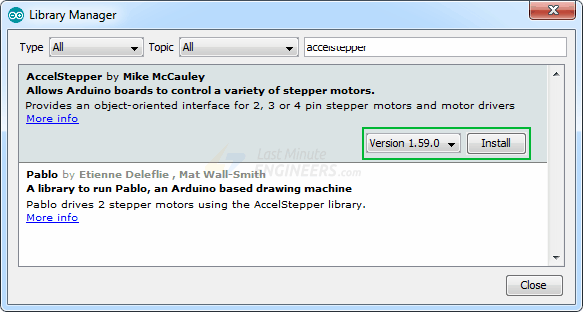
Filter your search by typing ‘accelstepper‘. Click on the first entry and then select Install.
Arduino Code
Here is the simple sketch that accelerates the stepper motor in one direction and then decelerates to come to rest. Once the motor makes one revolution, it changes the direction of spinning. And it keeps doing this over and over again.
// Include the AccelStepper Library
#include
// Define step constant
#define FULLSTEP 4
// Creates an instance
// Pins entered in sequence IN1-IN3-IN2-IN4 for proper step sequence
AccelStepper myStepper(FULLSTEP, 8, 10, 9, 11);
voidsetup() {
// set the maximum speed, acceleration factor,
// initial speed and the target position
myStepper.setMaxSpeed(1000.0);
myStepper.setAcceleration(50.0);
myStepper.setSpeed(200);
myStepper.moveTo(2038);
}
voidloop() {
// Change direction once the motor reaches target position
if (myStepper.distanceToGo() == 0)
myStepper.moveTo(-myStepper.currentPosition());
// Move the motor one step
myStepper.run();
}
Code Explanation:
We start by including the newly installed AccelStepper library.
#include
Now since we want our motor to run at full steps, we will define a constant for it. If you want the motor to run at half steps, set the constant to 8.
#define FULLSTEP 4
Next, we create an instance of a stepper library called myStepper with a pin sequence of 8, 10, 9, 11 (remember that the step sequence for these motors is IN1-IN3-IN2-IN4).
AccelStepper myStepper(FULLSTEP, 8, 10, 9, 11);
In the setup function we first set the maximum speed of the motor to 1000 which is about as fast as these motors can go. Then we set an acceleration factor for the motor to add acceleration and deceleration to the movements of the stepper motor.
We then set the regular speed to 200 and set the number of steps to 2038 (since the 28BYJ-48 with its gearing takes 2038 steps per revolution).
void
المواصفات التقنية
لسه مفيش مواصفات مسجلة
بنسجل المواصفات التقنية للمنتج ده وهتظهر هنا أول ما تخلص.
التقييمات
0.0
☆☆☆☆☆
لسه مفيش تقييمات
5★
0
4★
0
3★
0
2★
0
1★
0
لسه مفيش تقييمات للمنتج ده
كن أول واحد يقيّمه وتساعد اللي بعدك يقرر.
الأسئلة الشائعة
لسه مفيش أسئلة على المنتج ده
أول ما توصلنا أسئلة متكررة على المنتج ده هنجاوب عليها هنا.
مش لاقي إجابتك؟
اسألنا - نرد عليك على واتساب
منتجات مرتبطة
قد يعجبك أيضاً
 آخر قطعة واحدة
 آخر 3 قطع
درايفرات مواتير
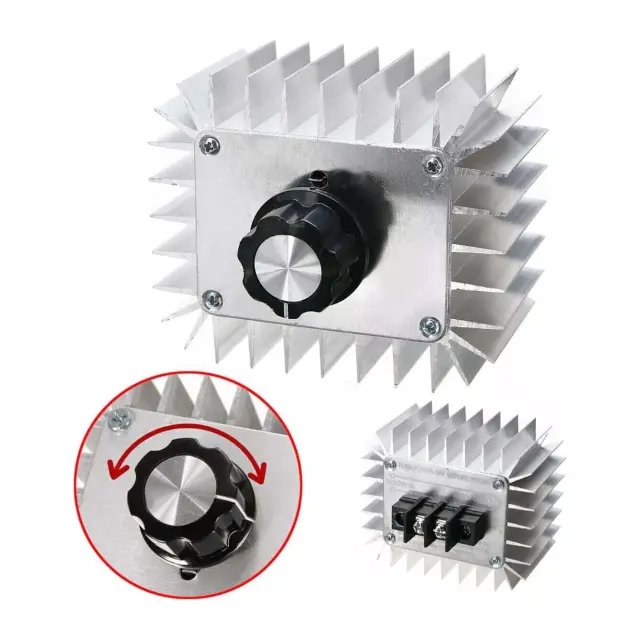
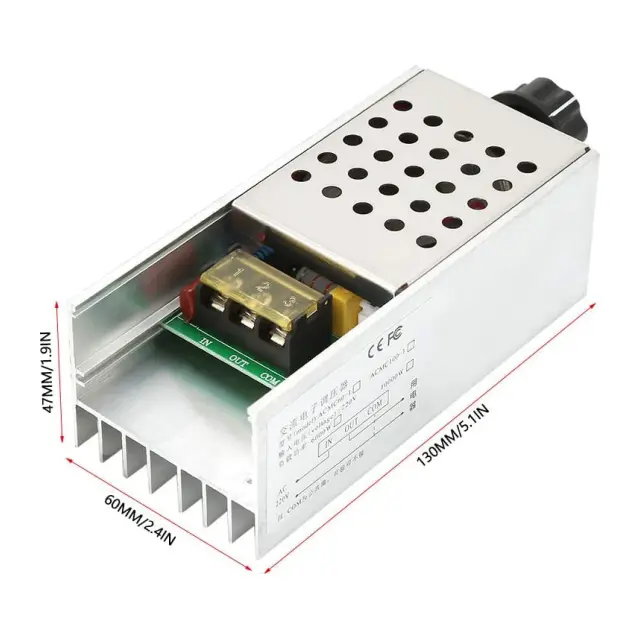
منظم جهد SCR للتحكم في سرعة الموتور والإضاءة والحرارة 220 فولت AC 6000 وات
★★★★★
(0)
375
ج.م
 متوفر
متوفر
 متوفر
متوفر
 متوفر
متوفر
 متوفر
متوفر
 متوفر
متوفر
 متوفر
متوفر
40
ج.م
متوفر - يوصلك خلال 72 ساعة