
سنسورات حرارة ورطوبة
اسألنا - نرد عليك على واتساب
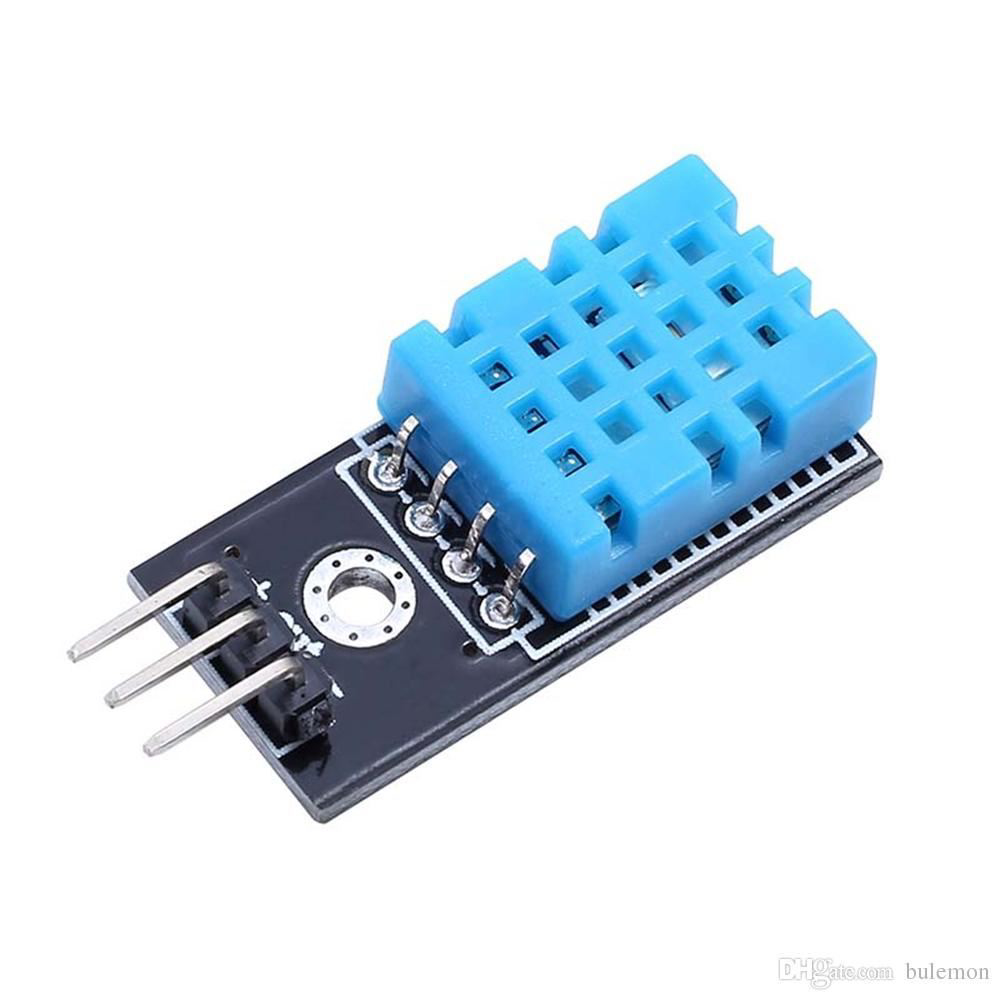
سينسور حرارة ورطوبة DHT11
☆☆☆☆☆
0.0
(مفيش تقييمات)
رمز المنتج: 30740
50
ج.م
متوفر
الكمية:
يوصلك خلال 72 ساعة
دفع آمن. نقبل:
بطاقة بنكية
محفظة إلكترونية
الدفع عند الاستلام
إنستا باي
يُشترى معاً عادةً
 هذا المنتج
سينسور حرارة ورطوبة DHT11
50
ج.م
الإجمالي
940
ج.م
عن هذا المنتج
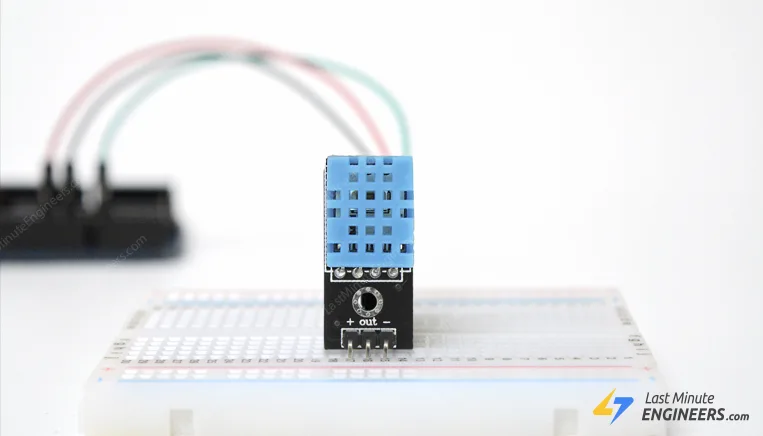
Give your next Arduino project the ability to sense the world around it with the inexpensive DHT11 digital temperature & humidity sensor module from AOSONG.
This sensor is pre-calibrated and don’t require extra components so you can start measuring relative humidity and temperature right away.
How DHT11 Measures Temperature and Humidity
Inside the DHT11, there is a humidity sensing component along with a Thermistor.
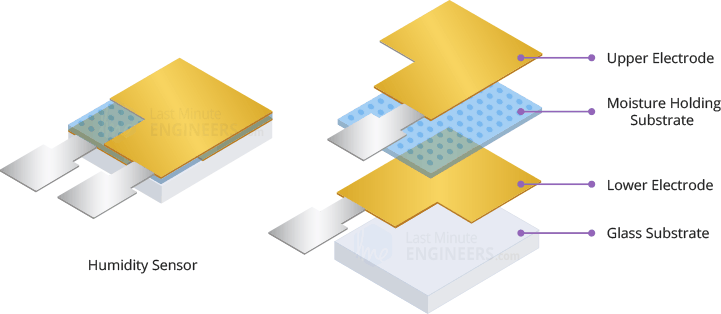
Humidity sensing component has two electrodes with moisture holding substrate sandwiched between them.
The ions are released by the substrate as water vapor is absorbed by it, which in turn increases the conductivity between the electrodes.
The change in resistance between the two electrodes is proportional to the relative humidity. Higher relative humidity decreases the resistance between the electrodes, while lower relative humidity increases the resistance between the electrodes.
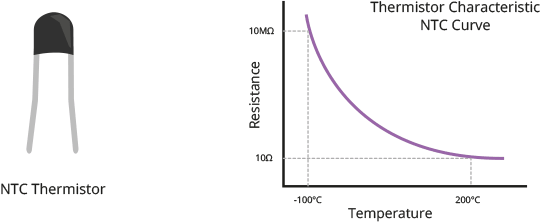
DHt11 also contains a NTC/Thermistor to measure temperature. A thermistor is a thermal resistor whose resistance changes drastically with temperature. The term “NTC” means “Negative Temperature Coefficient”, which means that the resistance decreases with increase of the temperature.
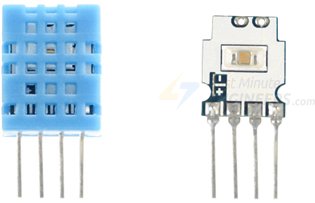
On the other side, there is a small PCB with an 8-bit SOIC-14 packaged IC. This IC measures and processes the analog signal with stored calibration coefficients, does analog to digital conversion and spits out a digital signal with the temperature and humidity.
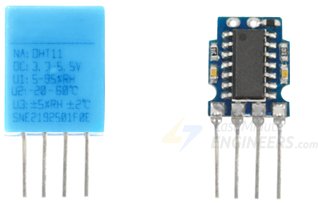
DHT11 Module Hardware Overview
At the heart of the module is the digital temperature & humidity sensor manufactured by AOSONG – DHT11.
DHT11 Sensor
DHT11 can measure temperature from 0°C to 50°C with ±2.0°C accuracy, and humidity from 20 to 80% with 5% accuracy.
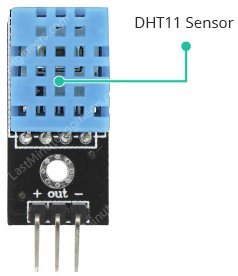
Note that the sampling rate of the DHT11 is 1Hz, meaning you can get new data from it once every second.
Supporting Circuitry
The module comes with all the essential supporting circuitry, so it should be ready to run without any extra components.
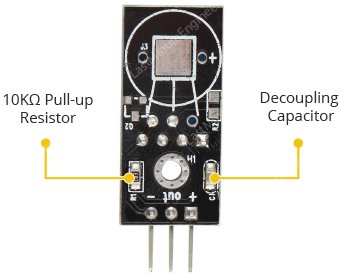
The DHT11 sensors usually require external pull-up resistor of 10KΩ between VCC and Out pin for proper communication between sensor and the Arduino. However, the module has a built-in pull-up resistor, so you need not add it.
The module also has a decoupling capacitor for filtering noise on the power supply.
DHT11 Module Pinout
The DHT11 module is fairly easy to connect. It has only three pins:
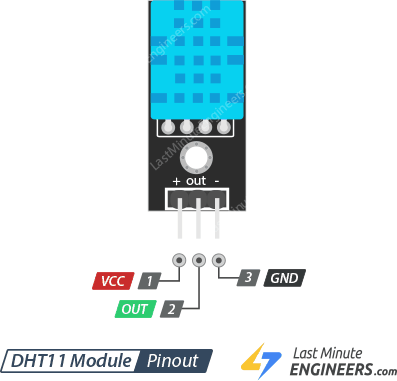
+ (VCC) pin supplies power for the sensor. 5V supply is recommended, although the supply voltage ranges from 3.3V to 5.5V. In case of 5V power supply, you can keep the sensor as long as 20 meters. However, with 3.3V supply voltage, cable length shall not be greater than 1 meter. Otherwise, the line voltage drop will lead to errors in measurement.
Out pin is used to communication between the sensor and the Arduino.
– (GND) should be connected to the ground of Arduino.
Wiring DHT11 Module to Arduino
Let’s hook the DHT11 module up to the Arduino.
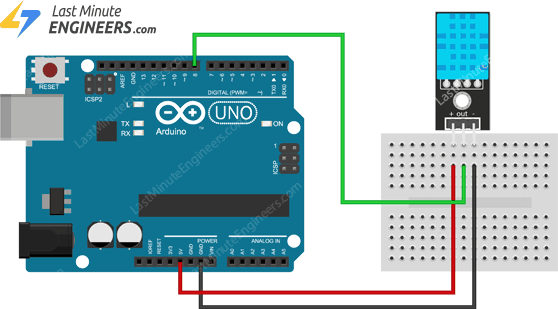
Connections are fairly simple. Start by connecting + (VCC) pin to the 5V output on the Arduino and connect – (GND) to ground. Finally, connect the Out pin to the digital pin #8.
The following diagram shows you how to wire everything.
Installing DHT library
DHT11 sensors have their own single wire protocol for transferring the data. This protocol requires precise timing. Fortunately, DHT Library was written to hide away all the complexities so that we can issue simple commands to read the temperature and humidity data.
Download the library first, by visiting the GitHub repo or, just click this button to download the zip:
To install it, open the Arduino IDE, go to Sketch > Include Library > Add .ZIP Library, and then select the DHTlib ZIP file that you just downloaded.
Arduino Code – Basic Example
Once you have the library installed, you can copy this sketch into the Arduino IDE.
The following test sketch will print the temperature and relative humidity values on the serial monitor. Try the sketch out; and then we will explain it in some detail.
#include // Include library
#define outPin 8 // Defines pin number to which the sensor is connected
dht DHT; // Creates a DHT object
voidsetup() {
Serial.begin(9600);
}
voidloop() {
int readData = DHT.read11(outPin);
float t = DHT.temperature; // Read temperature
float h = DHT.humidity; // Read humidity
Serial.print("Temperature = ");
Serial.print(t);
Serial.print("°C | ");
Serial.print((t*9.0)/5.0+32.0); // Convert celsius to fahrenheit
Serial.println("°F ");
Serial.print("Humidity = ");
Serial.print(h);
Serial.println("% ");
Serial.println("");
delay(2000); // wait two seconds
}
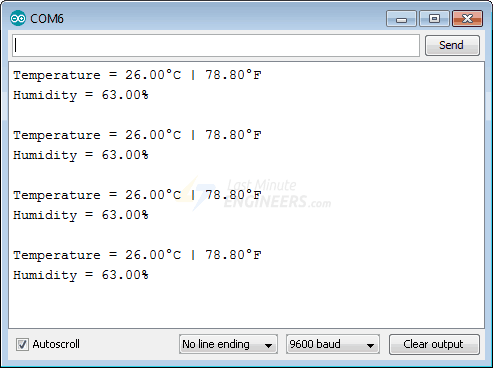
Once the sketch is uploaded, open a Serial Monitor window to see the output from the Arduino.
Code Exaplanation:
The sketch starts by including DHT library and defining the Arduino pin number to which our sensor’s Out pin is connected. Then we create a DHT object to access special functions related to the library.
#include
#define outPin 8
dht DHT;
In the ‘setup’ function; we initiate the serial communication as we will use the serial monitor to print the results.
voidsetup() {
Serial.begin(9600);
}
In the ‘loop’ function; we will use the read11() function which reads the data from the sensor. It takes sensor’s Data pin number as a parameter.
int readData = DHT.read11(outPin);
Once the humidity and temperature values are calculated, we can access them by:
float t = DHT.temperature; // Read temperature
float h = DHT.humidity; // Read humidity
The DHT object returns temperature value in Celsius (°C). It can be converted in to Fahrenheit (°F) using a simple formula:
T(°F) = T(°C) × 9/5 + 32
Serial.print((t * 9.0) / 5.0 + 32.0);
Arduino Code – Displaying Results on LCD
Sometimes you come up with an idea where you want to monitor temperature and humidity levels in your DIY incubator. Then you’ll probably need 16×2 character LCD to display prevailing conditions in your incubator, instead of a serial monitor. So, in this example, we’ll hook the LCD up to the Arduino along with the DHT11 module.
In case you are not familiar with 16×2 character LCDs, consider reading (at least skimming) below tutorial.

Interfacing 16×2 Character LCD Module with Arduino
Do you want your Arduino projects to display status messages or sensor readings? Then these LCD displays can be a perfect fit. They are extremely...
Make connections to the LCD as shown below.
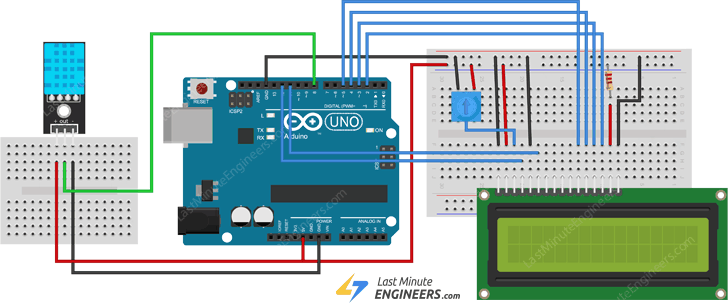
The following sketch will print the temperature and relative humidity values on the 16×2 character LCD. It uses the same code except we print values on LCD.
#include // Include LiquidCrystal Library
#include
#define outPin 8
LiquidCrystal lcd(12, 11, 5, 4, 3, 2); // Create an LCD object.
dht DHT; // Create a DHT object
voidsetup() {
lcd.begin(16,2); // Initialize the LCD
}
voidloop() {
int readData = DHT.read11(outPin);
float t = DHT.temperature;
float h = DHT.humidity;
lcd.setCursor(0,0);
lcd.print("Temp.: ");
lcd.print(t);
lcd.print((char)223);//shows degrees character
lcd.print("C");
lcd.setCursor(0,1);
lcd.print("Humi.: ");
lcd.print(h);
lcd.print("%");
delay(2000);
}
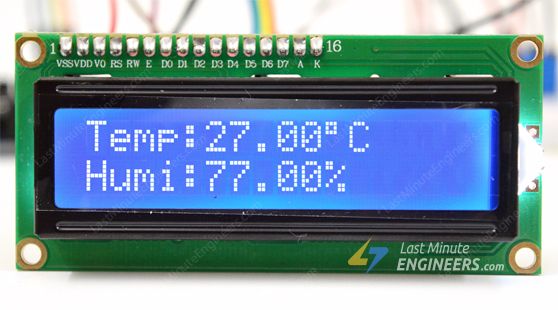
If everything is fine, you should see below output on the LCD.
المواصفات التقنية
لسه مفيش مواصفات مسجلة
بنسجل المواصفات التقنية للمنتج ده وهتظهر هنا أول ما تخلص.
التقييمات
0.0
☆☆☆☆☆
لسه مفيش تقييمات
5★
0
4★
0
3★
0
2★
0
1★
0
لسه مفيش تقييمات للمنتج ده
كن أول واحد يقيّمه وتساعد اللي بعدك يقرر.
الأسئلة الشائعة
لسه مفيش أسئلة على المنتج ده
أول ما توصلنا أسئلة متكررة على المنتج ده هنجاوب عليها هنا.
مش لاقي إجابتك؟
اسألنا - نرد عليك على واتساب
منتجات مرتبطة
قد يعجبك أيضاً
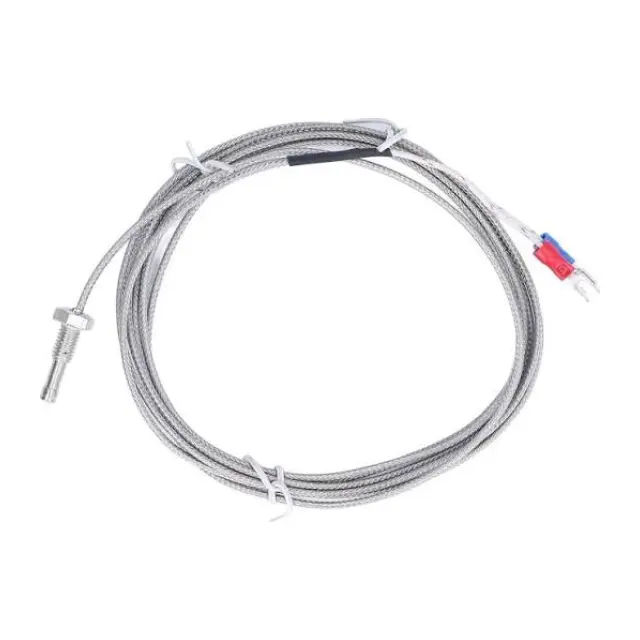 آخر قطعتين
 متوفر
متوفر
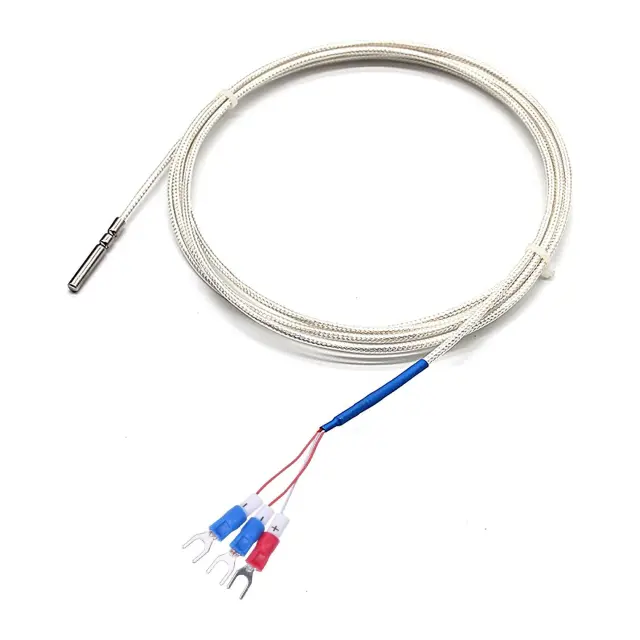
سنسورات حرارة ورطوبة
سنسور حرارة RTD طراز Pt100 مسبار ستانلس ستيل طوله 100 مم 3 أسلاك 50-45°م
★★★★★
(0)
225
ج.م
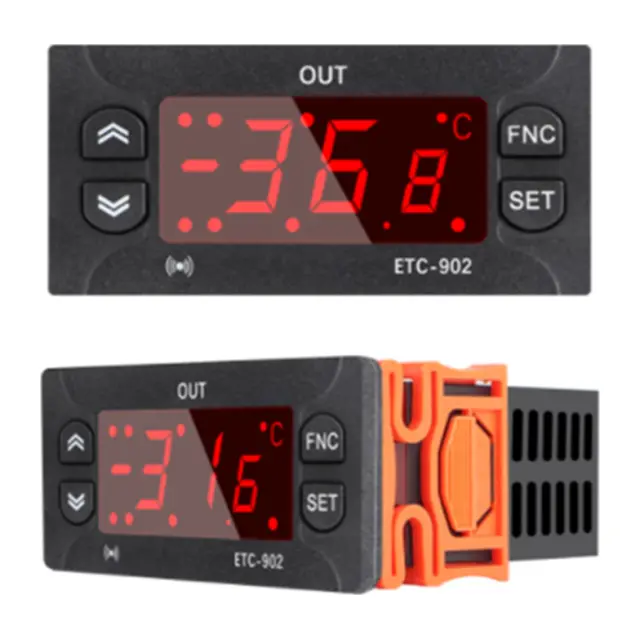 آخر قطعتين
سنسورات حرارة ورطوبة
جهاز تحكم رقمي في الحرارة كايان موديل: ETC-902 (220 فولت AC 10 أمبير)
★★★★★
(0)
600
ج.م
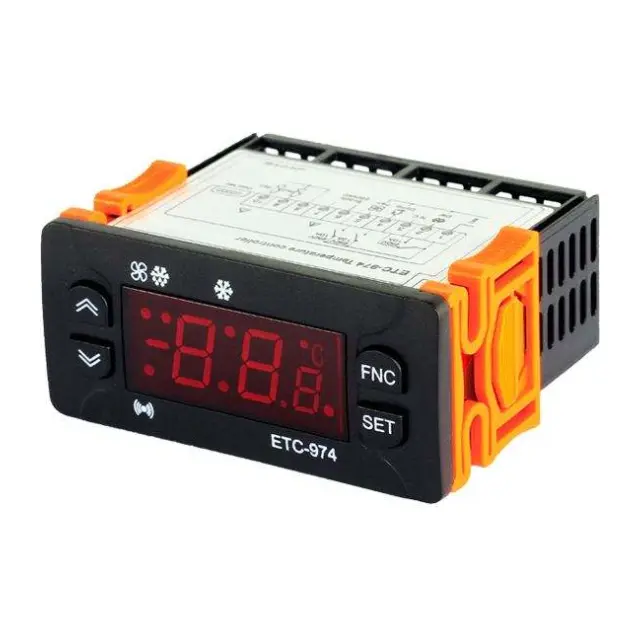 آخر قطعتين
سنسورات حرارة ورطوبة
جهاز تحكم رقمي في الحرارة كايان موديل: ETC-974 (220 فولت AC 10 أمبير)
★★★★★
(0)
1,150
ج.م
 متوفر
متوفر
 متوفر
متوفر
 متاح للطلب
-14%
 متوفر
متوفر
متوفر
50
ج.م
متوفر - يوصلك خلال 72 ساعة